
PyQt Calculator: State Logic and Debugging
Table of Content
Challenge 1: Understanding and Implementing Calculator State Logic
Challenge 2: Tracing Bugs in Hidden Calculator State
Introduction
Project Context

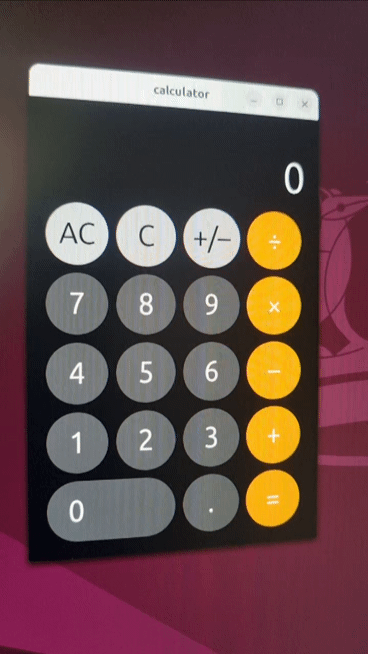
calculator GUI made with PyQT (left), User can operate the app using num pads (right)
This was a one-day solo mini project completed during a six-month ROS2 Robotics Software Development Bootcamp in South Korea. The project was part of an early GUI programming module using Python and PyQt.
Project Timeline: April 2025 ~ April 2025
The goal was to build a functional calculator application with a clickable GUI. The project required connecting PyQt interface elements to the calculator logic so users could input numbers, perform basic operations, clear/reset values, and see reliable results on the display.
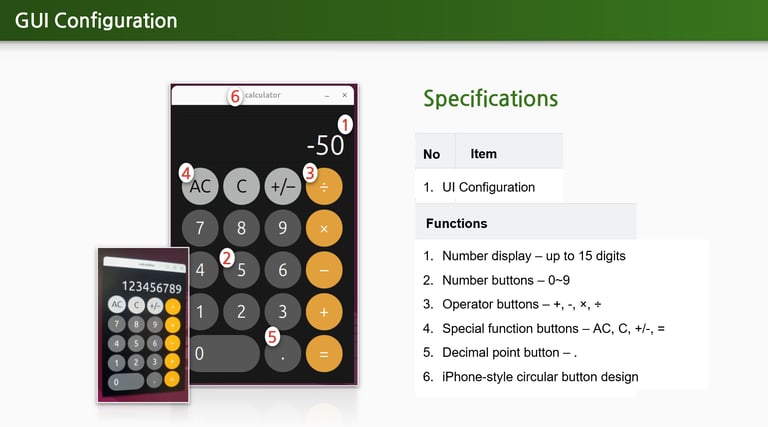
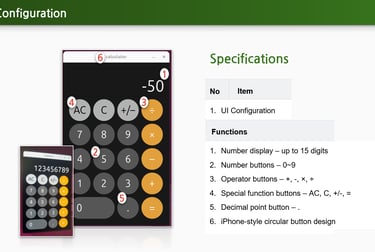
The specification for the calculator's GUI Configuration. The overall design was inspired by the iPhone Calculator
Project Goal
Challenge 1: Understanding and Implementing Calculator State Logic
Recognizing the Problem Behind a Simple Interface
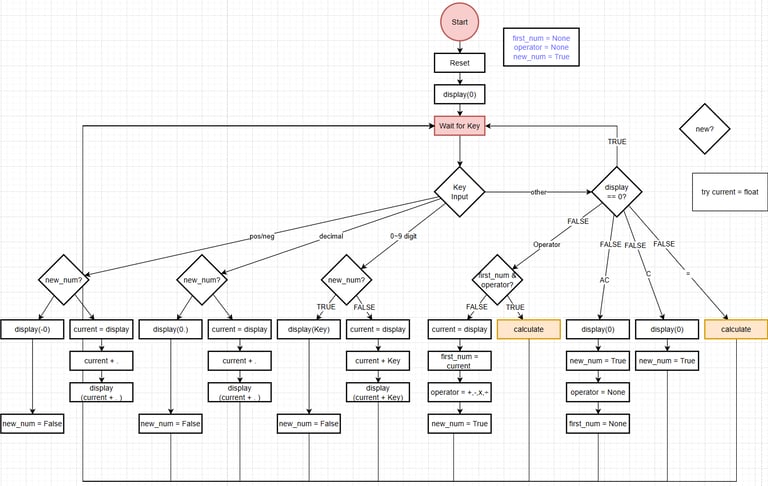
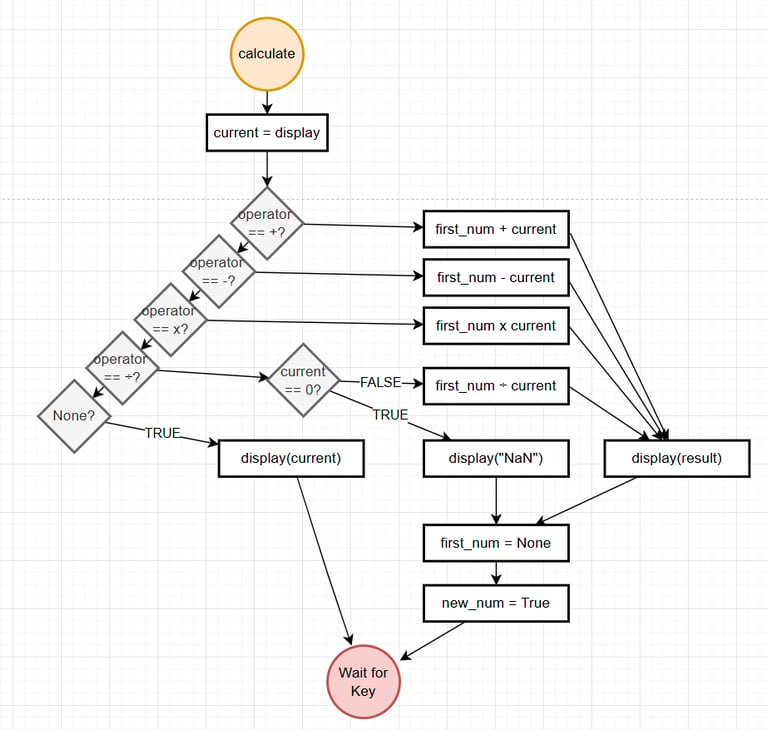
The calculator looked simple from the user’s perspective, but each button press had to update the internal state correctly. If the program did not clearly track the current number, selected operator, previous value, displayed value, and result after pressing equals, the calculator could quickly produce incorrect or unpredictable results.
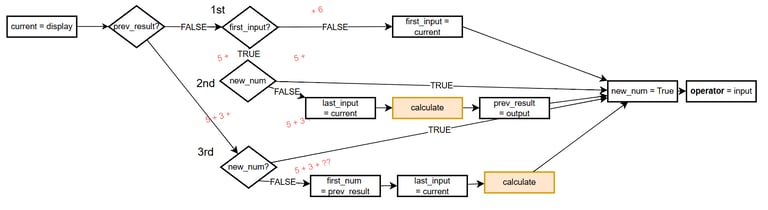
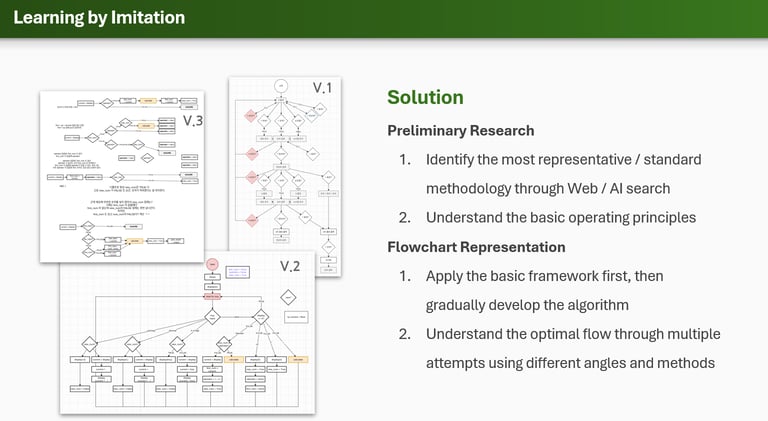
A few examples of the many failed logic sequences in a flow chart. Had to iterate more than a dozen versions to reach the final version
Researching the Logic Before Coding
Because I had not previously thought about how calculator logic works internally, I first needed to understand the expected behaviour before implementing it. Instead of continuing to guess from scratch, I researched the behaviour of established calculators and studied how user inputs are converted into state changes. This gave me a clearer model to follow before writing the logic.
Challenge / Problem Visual 1
Prioritizing Reliable Behaviour Over Extra Features
After understanding the calculator’s flow, I focused on ensuring the core functions behaved predictably rather than adding more features. The priority was to make basic operations, display updates, clear/reset behaviour, decimal input, and invalid cases (such as division by zero) work reliably through the PyQt interface rather than a feature-heavy program with fragile logic.
Challenge / Problem Visual 3
Challenge 2: Tracing Bugs in Hidden Calculator State
Identifying the Limit of Output-Based Debugging
After the calculator logic started working, the next challenge was debugging errors that were not obvious from the display alone. An incorrect result could result from several internal causes, such as an incorrectly stored value, an incorrect operator selection, a reset condition, or a display update. Checking only the final output made it difficult to know where the logic had failed.
Challenge / Problem Visual 1
Making Internal Values Visible
To solve this, I created a hidden developer-side debugging tool inside the program. It was not part of the user-facing calculator interface, but it allowed me to inspect key internal values while testing different button sequences. This made the calculator’s hidden state easier to understand during development.
Challenge / Problem Visual 2
Tracing Errors Step by Step
Using the debugging tool, I checked how values changed after each input. Instead of guessing why the final result was wrong, I could trace whether the current number, previous value, operator, or display value had been stored or updated incorrectly.
Challenge / Problem Visual 3
Conclusion
Outcome
The final application successfully functioned as a PyQt-based calculator with a clickable GUI. It handled basic arithmetic operations, display updates, clear/reset behaviour, decimal input, and simple edge cases such as division by zero.
Outcome Vissual
Reflection
This project became an early foundation for later software and robotics development work. It showed that even simple GUI programs require clear internal logic, reliable state handling, and enough debugging visibility to verify behaviour step by step.
Extra Visual